Hey guys!
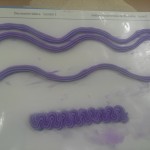
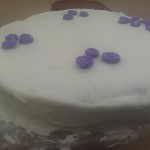
So I had my second decorating class yesterday, and it was great practice. I made icings at different consistencies in order to practice doing different shapes and actually icing the cake. My cake is a little rough, partially due to my lack of experience, but also due to the lack of a refrigerator at my class location (In between each layer of icing, you should refrigerate the cake for at least 30 mins, if not an hour, or even longer for a larger cake, in order to ensure the icing stays smooth and on the cake and no crumbs come through to the surface of your icing). However, it is a step in the right direction, and I think I will get better soon!
Here are some pics:
For yesterday’s class, I was asked to bring in a cake to decorate. Due to my procrastination and lack of time, I purchased a box cake mix that I could throw together, bake, and still have time to cool before my class; I had about 2 hours. I must say, it was a good solution since I had no plans of eating the cake, and it worked out well in my time crunch, but the taste reminded me why I’ve made cakes from scratch for so long (Up until Monday, I don’t remember the last time I bought a cake mix: I believe I was in 5th grade). Despite the mix being entirely organic, which I was a hug fan of, the taste still did not compare to a scratch cake. I realized that my last post doesn’t help so much for making a scratch cake, so I will give you guys some tips now on making a scratch cake.
First, don’t be intimidated. It’s simple once you get the hang of it, and it’ll feel like the back of your hand once you’ve done it enough times. The basic cake goes through the same steps, just with different ingredients. So basically, once you know one, you know many (That includes cupcakes!).
Let’s say you’re making a yellow cake for your dinner party next week. You will probably need the basic ingredients: a good amount of butter, milk, eggs, flour, sugar, baking powder, salt, and vanilla. You can separate these into groups, as this is how they will be added into the batter:
- Butter, Sugar, Eggs
- Flour, baking powder, salt
- milk and vanilla*
You want to make sure all your ingredients are room temperature. The different temps will mess with the mixing process, so the extra 10 minutes waiting for the butter on the counter is worth it. How do you know when, for example, butter is ready to use? You should be able to dent it with some pressure. It should be soft and squeezable, but still maintain structure, and maybe be even a little cold on the inside. If you don’t have the time to wait, I usually pop a stick in the microwave for 8 seconds on high, and it does the trick. If its not enough, continue on intervals of 5 seconds until it is soft enough.
You’re going to want an electric mixer for this; you don’t need necessarily, but it will take a crazy amount of arm strength. The recipe will probably ask you to cream the butter and the sugar. Do exactly as it says, and allow the mixer to go until the butter looks whipped and airy. For me, a good sign of this is when most of the butter is sticking to the sides of the bowl, and the sugar is mostly mixed in. You are then going to add the eggs one at a time. Be sure to mix well between each egg, otherwise the mixture will “curdle” (the mixture will look like curdled milk. Don’t worry if this happens, it will even out when you mix the dry ingredients in).
When mixing dry ingredients, either sift the flour with the other ingredients, or “fluff” it together with a whisk. Doing this will add air into the batter, creating a fluffier cake.
Mix the wet ingredients. Pretty straightforward step.
Now, you are going to add everything to the butter mixture. Do not add the ingredients all as once to the butter mixture. To make sure the batter stays light, you are going to alternate between adding the wet and dry ingredients, always beginning and ending with the dry ingredients. With the mixer on low, add 1/3 of the dry ingredients. Mix only until you see no streaks left, and then add 1/2 of the wet ingredients. Now had 1/2 of the remaining dry ingredients, and mix until no streaks remain. Then add the remaining wet ingredients, and then the remaining dry. At this point, its a good idea to scrap down the bowl with the spatula, making sure you got the bottom and any forgotten areas of the bowl. If there is significant amount of unmixed ingredients, go ahead and mix them on low with the electric mixer.
Evenly divide the batter between your pans. It helps to have a scale at this point; if you don’t, don’t fret! You can eyeball it too, your cakes will be fine. Bake the cakes for the recommended time, checking on them halfway through the baking process.
About 10 minutes before the recommended baking time is up, keep a watchful eye on your cakes. Test the cake in the center with a toothpick or skewer by placing it gently through the center of the cake. If no crumbs come out, then it is done. If a few crumbs come out, bake for another 3-5 minutes. If it still has batter on the tester, then you have a while to go. You don’t necessarily want to wait until the cake shrinks away from the sides of the pan, as this means your cake is drying and shrinking.
TA-DAH!!! You made a homemade cake from scratch! It may seem like a lot of steps, and yes, it is slightly more time consuming than making a boxed cake, but the taste is so much better it is truly worth it. Getting used to the process also helps you get more comfortable and faster, so you can pop cakes out like that *snap*. You can use the same recipe for cake as for cupcakes, just fill each cupcake hole in the cupcake tin 2/3 the way up with batter.
I suggest that anyone who shudders in fear of making a cake from scratch to try it out. You can do it!
Here’s a good yellow cake recipe:
http://baking.about.com/od/cakes/r/basicyellow.htm
Until next time, happy baking!


Comments are closed.